Making our pages editable with Tina
Overview
Currently, the Next Blog Starter grabs content from the file system. But since Tina comes with a GraphQL API on top of the filesystem, we’re going to query that instead. Using the GraphQL API will allow you to use the power of TinaCMS, you will be able to retrieve the content and also edit and save the content directly.
Creating the getStaticPaths query
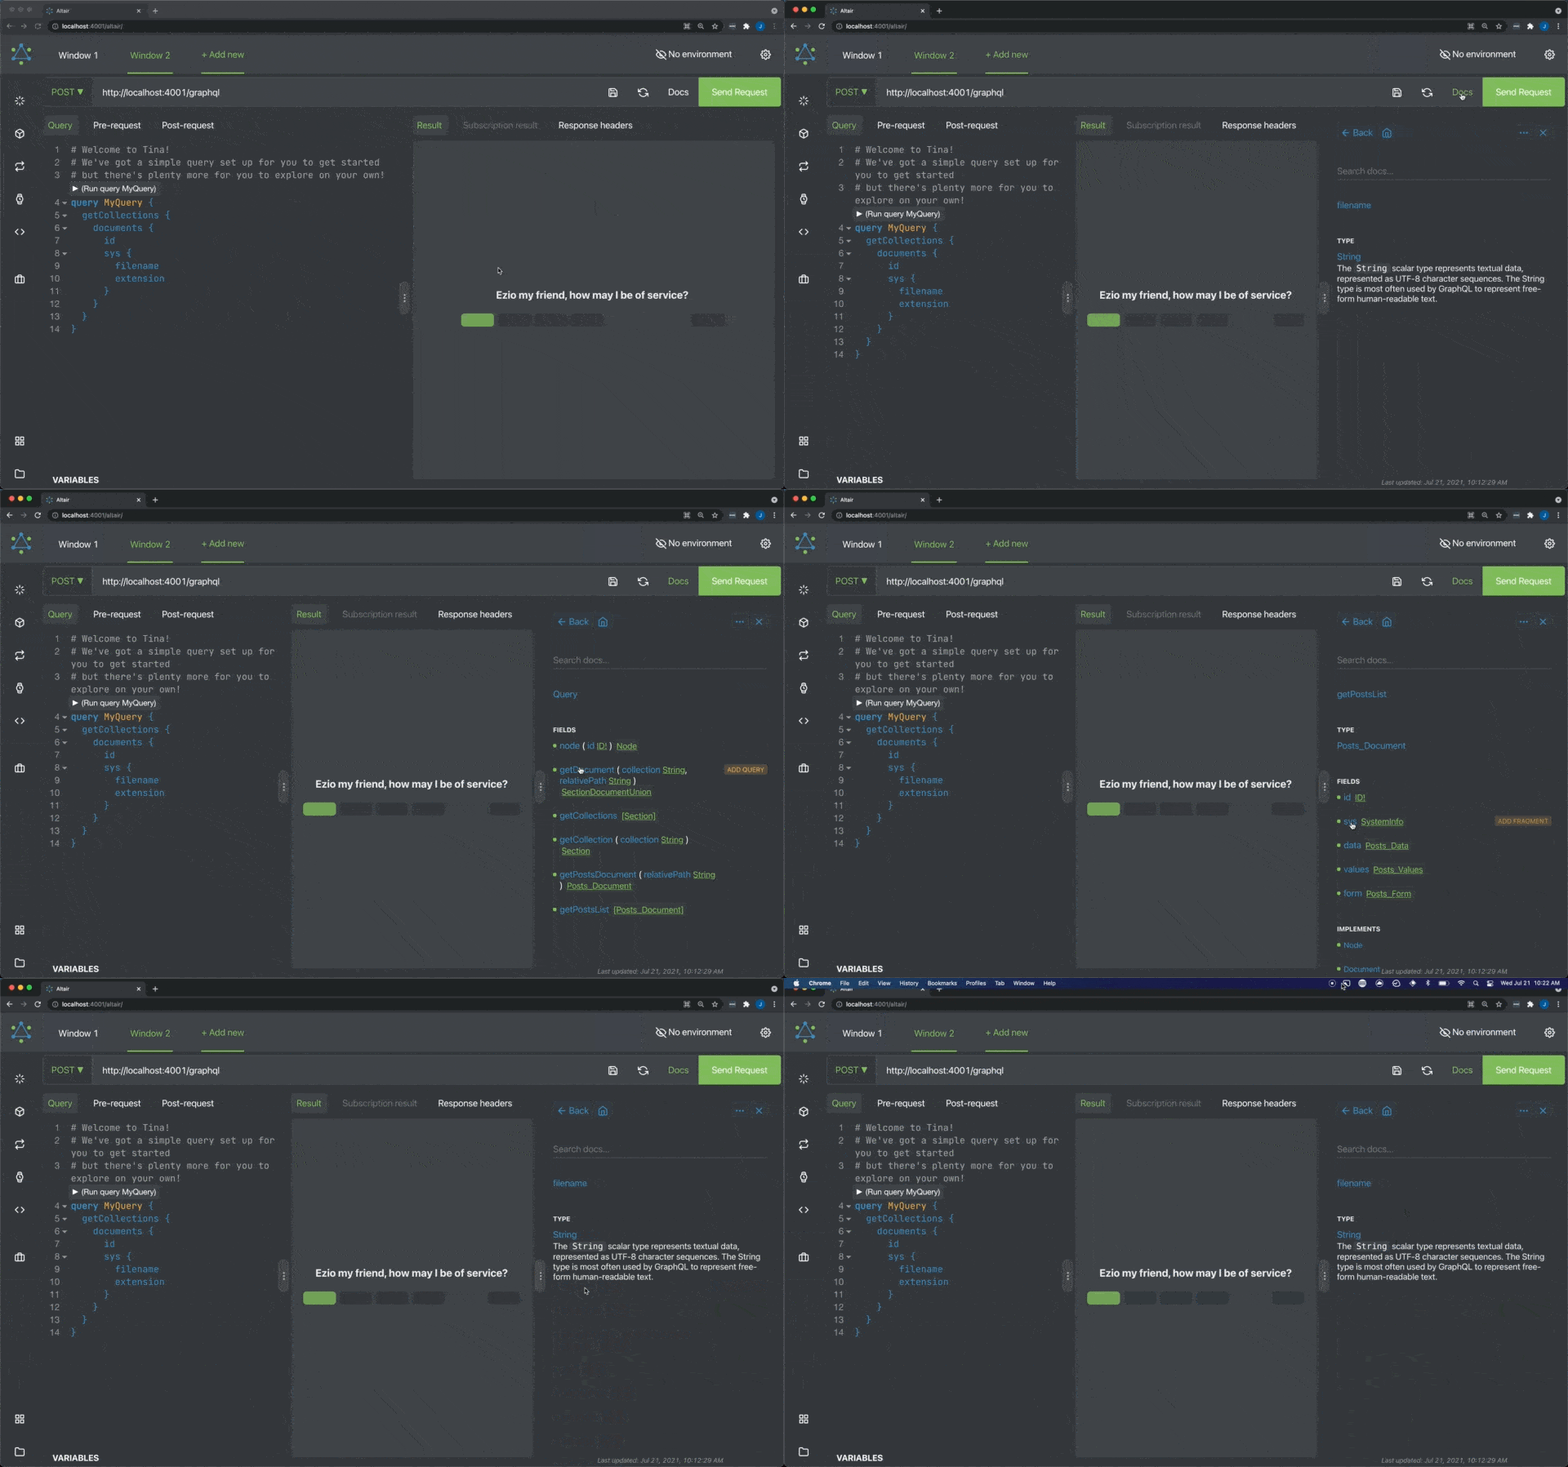
The getStaticPaths query is going to need to know where all of our markdown files are located, with our current schema you have the option to use getPostList which will provide a list of all posts in our _posts folder. Make sure your local server is running and navigate to http://localhost:4001/altair and select the Docs button. The Docs button gives you the ability to see all the queries possible and the variables returned:

So based upon the getPostList we will want to query the sys which is the filesystem and retrieve the filename, which will return all the filenames without the extension.
query {
  getPostList {
    edges {
      node {
        sys {
          basename
        }
      }
    }
  }
}If you run this query in the GraphQL client you will see the following returned:
{
  "data": {
    "getPostList": {
      "edges": [
        {
          "node": {
            "sys": {
              "filename": "dynamic-routing"
            }
          }
        },
        {
          "node": {
            "sys": {
              "filename": "hello-world"
            }
          }
        },
        {
          "node": {
            "sys": {
              "filename": "preview"
            }
          }
        }
      ]
    }
  }
}Adding this query to our Blog.
The NextJS starter blog is served on the dynamic route /pages/posts/[slug].js when you open the file you will see a function called getStaticPaths at the bottom of the file.
export async function getStaticPaths() {

....
Remove all the code inside of this function and we can update it to use our own code. The first step is to add an import to the top of the file to be able interact with our graphql and remove the getPostBySlug and getAllPosts imports we won't be using:
//other imports
.....
- import { getPostBySlug, getAllPosts } from '../../lib/api'
+ import { staticRequest } from "tinacms";
Inside of the getStaticPaths function we can construct our request to our content-api, when making a request we expect a query or mutation and then variables to be passed to the query, here is an example:
staticRequest({
  query: '...', // our query
  variables: {...}, // any variables used by our query
}),"What does
staticRequestdo?"It's just a helper function which supplies a query to your locally-running GraphQL server, which is started on port
4001. You can just as easily usefetchor an http client of your choice.
We can use the getPostList query from earlier to build our dynamic routes:
export async function getStaticPaths() {
  const postsListData = await staticRequest({
    query: `
      query {
        getPostList {
          edges {
            node {
            sys {
              filename
              }
            }
          }
      }
    }
    `,
    variables: {},
  })
  return {
    paths: postsListData.getPostList.edges.map(edge => ({
      params: { slug: edge.node.sys.filename },
    })),
    fallback: false,
  }
}Quick break down of getStaticPaths
The getStaticPaths code takes the graphql query we created, because it does not require any variables we can send down an empty object. In the return functionality we map through each item in the postsListData.getPostList and create a slug for each one.
We now need to create one more query, this query will fill in all the data and give us the ability to make all our blog posts editable.
Creating the getStaticProps query
The getStaticProps query is going to deliver all the content to the blog, which is how it works currently. When we use the GraphQL API we will both deliver the content and give the content team the ability to edit it right in the browser.
We need to query the following things from our content api:
- Title
- Excerpt
- Date
- Cover Image
- OG Image data
- Author Data
- Body content
Creating our Query
Using our local graphql client we can query the getPostDocument using the path to the blog post in question, below is the skeleton of what we need to fill out.
query BlogPostQuery($relativePath: String!) {
  getPostDocument(relativePath: $relativePath) {
    # data from our posts.
  }
}
We can now fill in the relevant fields we need to query, take special note of both author and ogImage which are grouped so they get queried as:
author {
  name
  picture
}
ogImage {
  url
}
Once you have filled in all the fields you should have a query that looks like the following:
query BlogPostQuery($relativePath: String!) {
  getPostDocument(relativePath: $relativePath) {
    data {
      title
      excerpt
      date
      coverImage
      author {
        name
        picture
      }
      ogImage {
        url
      }
      body
    }
  }
}
If you would like to test this out, you can add the following to the variables section at the bottom
{"relativePath": "hello-world.md"}
Adding our query to our blog
Remove all the code inside of the getStaticProps function and we can update it to use our own code. Since these pages are dynamic, we'll want to use the values we returned from getStaticPaths in our query. We'll destructure params to grab the slug, using it as a relativePath. As you'll recall the "Blog Posts" collection stores files in a folder called _posts, so we want to make a request for the relative path of our content. Meaning for the file located at _posts/hello-world.md, we only need to supply the relative portion of hello-world.md.
export const getStaticProps = async ({ params }) => {
  const { slug } = params
  // Ex. `slug` is `hello-world`
  const variables = { relativePath: `${slug}.md` }
  // ...
}
We'll also want to call staticRequest to load our data for our specific page. You'll also notice that we will return the query & variables from getStaticProps. We'll be using these values within the TinaCMS frontend.
import { staticRequest } from 'tinacms'So the full query should look like this:
export const getStaticProps = async ({ params }) => {
  const { slug } = params
  const variables = { relativePath: `${slug}.md` }
  const query = `
    query BlogPostQuery($relativePath: String!) {
      getPostDocument(relativePath: $relativePath) {
        data {
          title
          excerpt
          date
          coverImage
          author {
            name
            picture
          }
          ogImage {
            url
          }
          body
        }
      }
    }
  `
  const data = await staticRequest({
    query: query,
    variables: variables,
  })

  return {
    props: {
      query,
      variables,
      data: data.getPostDocument.data,
      slug,
    },
  }
}Using the new content on the page
We now need to edit the Post function, firstly we are now going to pass in the data and slug to it instead of what was there before:
export default function Post({ data, slug }) {
  // original code
}
To make our code easy to follow and read we can destructure the data props:
export default function Post({ data, slug }) {
  const {
    title,
    coverImage,
    date,
    author,
    body,
    ogImage,
  } = data.getPostDocument.data
We also should set the <Layout preview={preview}> to false as we won't be using it.
  return (
-    <Layout preview={preview}>
+    <Layout preview={false}>
...
At this point we can replace all of the post.* with each of the new variables from Tina. It should look like the following
export default function Post({ data, slug}) {
  const {
    title,
    coverImage,
    date,
    author,
    body,
    ogImage,
  } = data.getPostDocument.data
  const router = useRouter()

- if (!router.isFallback && !post?.slug) {
+ if (!router.isFallback && !slug) {
    return <ErrorPage statusCode={404} />
  }
  return (
    <Layout preview={false}>
      <Container>
        <Header />
        {router.isFallback ? (
          <PostTitle>Loading…</PostTitle>
        ) : (
          <>
            <article className="mb-32">
              <Head>
                <title>
-                {post.title} | Next.js Blog Example with {CMS_NAME}
+                {title} | Next.js Blog Example with {CMS_NAME}
                </title>
-                <meta property="og:image" content={post.ogImage.url} />
+                <meta property="og:image" content={ogImage.url} />
              </Head>
              <PostHeader
-                title={post.title}
+                title={title}
-                coverImage={post.coverImage}
+                coverImage={coverImage}
-                date={post.date}
+                date={date}
-                author={post.author}
+                author={author}
              />
-              <PostBody content={post.content} />
+              <PostBody content={body} />
            </article>
          </>
        )}
      </Container>
    </Layout>
  )
}
Visit http://localhost:3000/posts/hello-world to see the GraphQL-powered page.
Adding contextual editing:
At this point, your page is rendering with the content loaded from Tina. We now want to setup Tina's contextual editing so that you can edit the content via the sidebar.
Let's update your page component like so:
- export default function Post({ data, slug}) {
+ export default function Post({ data: initialData, slug, query}) {
  const {
    title,
    coverImage,
    date,
    author,
    body,
    ogImage,
  } = data.getPostDocument.data
  const router = useRouter()

+  const { data } = useTina({
+    query,
+    variables: {},
+    data: initialData,
+  })
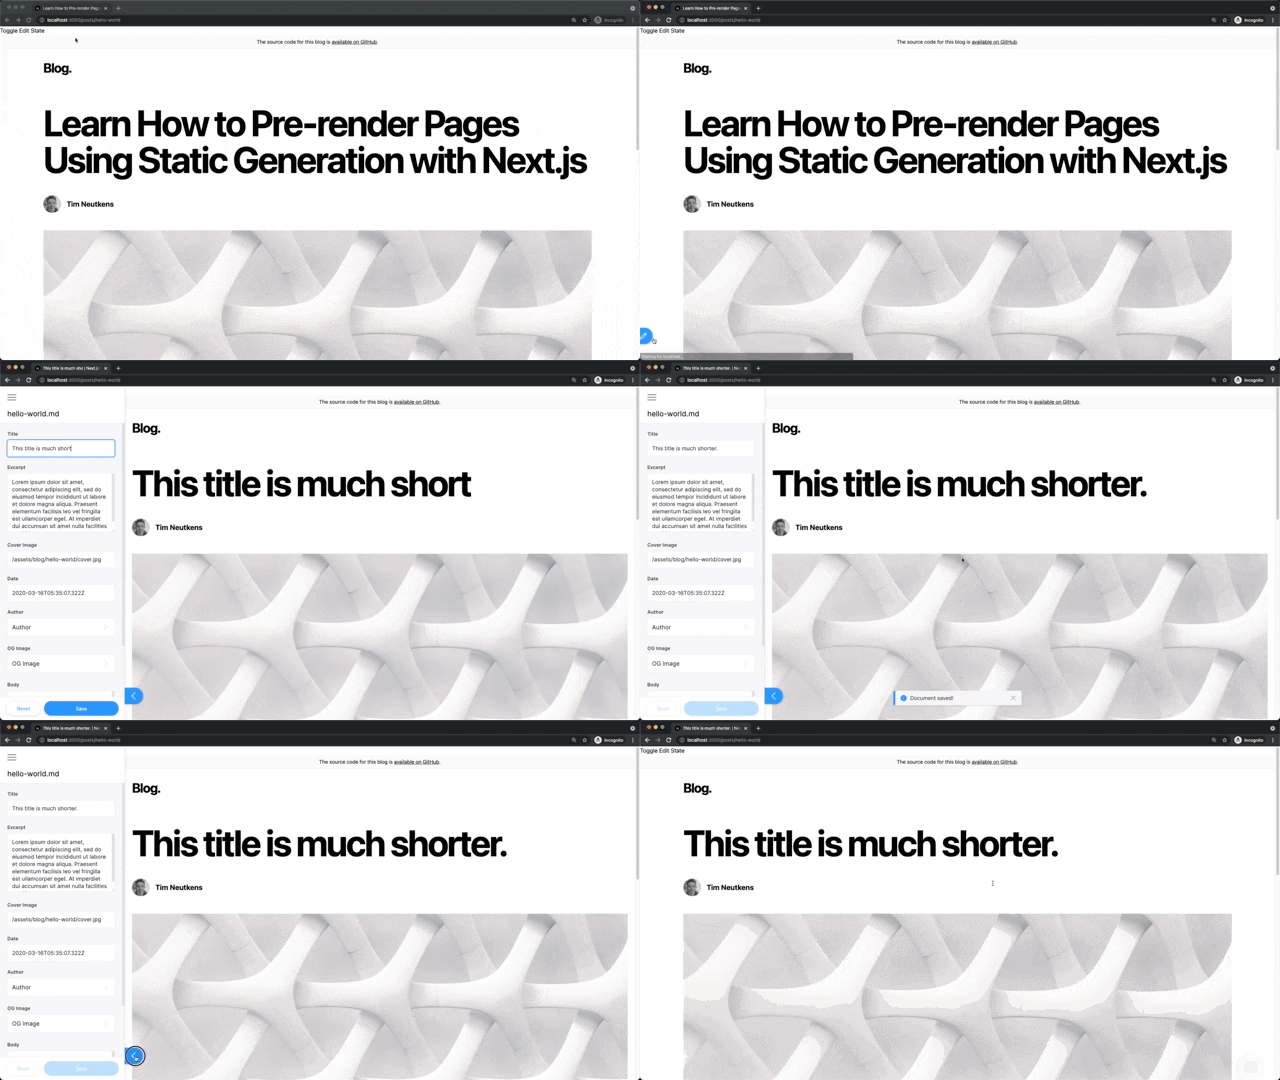
This filters our data through the useTina hook, which allows its content to be editable through the sidebar. When the user edits, it will update the data property, and cause the page to show the live data.
Editing content:
Now we are ready to launch and start editing the content, launch the application using the yarn tina-dev command and navigate one of the posts. Now because our application is "protected" you will need to navigate to http://localhost:3000/admin. Once you navigate to the admin route, the page will

At this point we have created an exact replication of the NextJS starter with the ability to edit any of the fields and now have the ability to make changes. You’ll notice the post’s body is in a single text field, which isn’t a great editing experience and isn't be returned as HTML. So in the next section we’re going to add a Markdown editor plugin and reuse the markdown to html code the Next.js team provided.
Last Edited: August 13, 2021